 nginx的安装与配置
# nginx的安装与配置
# 安装
Mac上搭建nginx教程 (opens new window)
- 安装
brew install nginx  # mac上通过brew进行安装

# 默认是安装到 /usr/local/Cellar/ 目录下
➜  cd /usr/local/Cellar/nginx
➜  nginx ls
1.17.3_1


  ~ which nginx  # 通过which 找到nginx所在路径
/usr/local/bin/nginx
➜  ~ ll /usr/local/bin/nginx # 查看该路径指向的实际运行文件位于哪里~
lrwxr-xr-x  1 admin  admin    34B  9 24 18:43 /usr/local/bin/nginx -> ../Cellar/nginx/1.17.3_1/bin/nginx
- 启动
sudo nginx # 安装后命令行直接输入即可启动
# nginx: [emerg] bind() to 0.0.0.0:8080 failed (48: Address already in use)
# nginx: [emerg] bind() to 0.0.0.0:8089 failed (48: Address already in use)
# nginx: [emerg] bind() to 0.0.0.0:443 failed (48: Address already in use)
# 修改配置
- 修改
nginx.conf文件
#  nginx的配置文件位于/usr/local/etc/目录下~
vim /usr/local/etc/nginx/nginx.conf # 打开nginx.conf文件

#  修改
user admin owner;  # admin为电脑用户名

# 在结尾大括号之前添加;
# /Users/admin/upload/upload.conf 是额外的配置文件
include /Users/admin/upload/upload.conf;
}
- 添加 /Users/admin/upload/upload.conf 文件,配置如下:
#  http配置
server
{
  charset utf-8;  # 字符编码类型
  listen 8089; # 端口号(这里自定义端口为8089,原nginx.conf配置中默认端口是8080)
  server_name http_host;   # 自定义name
  root /Users/admin/upload/;   # 资源文件的路径!!!
  autoindex on;   # 是否打开索引,一般线上资源为为off
  add_header Cache-Control "no-cache, must-revalidate";  # 缓存控制:不使用缓存
  location / {  # 路由:/ 表示监听所有路由
    add_header Access-Control-Allow-Origin *;  # 跨域处理:一般上线时*要改为具体域名~
  }
}

#  https配置
server
{
  listen 443 default ssl; # https的默认端口
  server_name https_host;
  root /Users/admin/upload/;
  autoindex on;
  add_header Cache-Control "no-cache, must-revalidate";
  location / {
    add_header Access-Control-Allow-Origin *;
  }

#   证书和密钥得先在阿里云上购买域名,申请ssl证书后,下载到本地,然后重命令,放到 /Users/admin/upload/https/ 目录下~
  ssl_certificate /Users/admin/upload/https/verneyzhou-code.cn.pem;  # 证书
  ssl_certificate_key /Users/admin/upload/https/verneyzhou-code.cn.key; # 密钥


  ssl_session_timeout  5m;  # 超时时间 5min
  ssl_protocols  SSLv3 TLSv1;
  ssl_ciphers  ALL:!ADH:!EXPORT56:RC4+RSA:+HIGH:+MEDIUM:+LOW:+SSLv2:+EXP;
  ssl_prefer_server_ciphers  on;
}
# 启动
- 启动
命令行输入
sudo nginx启动
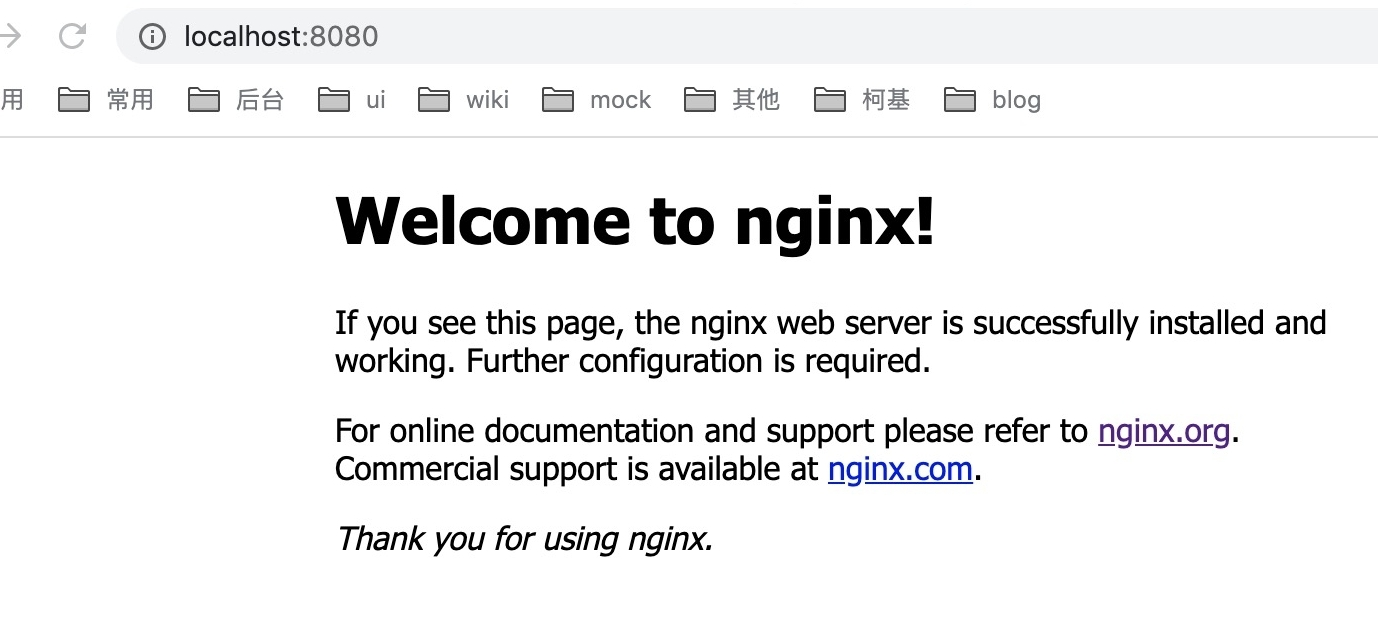
- 启动之后浏览器输入:
http://localhost:8080能访问到默认的位于/usr/local/Cellar/nginx/1.17.3_1/html/下的资源:
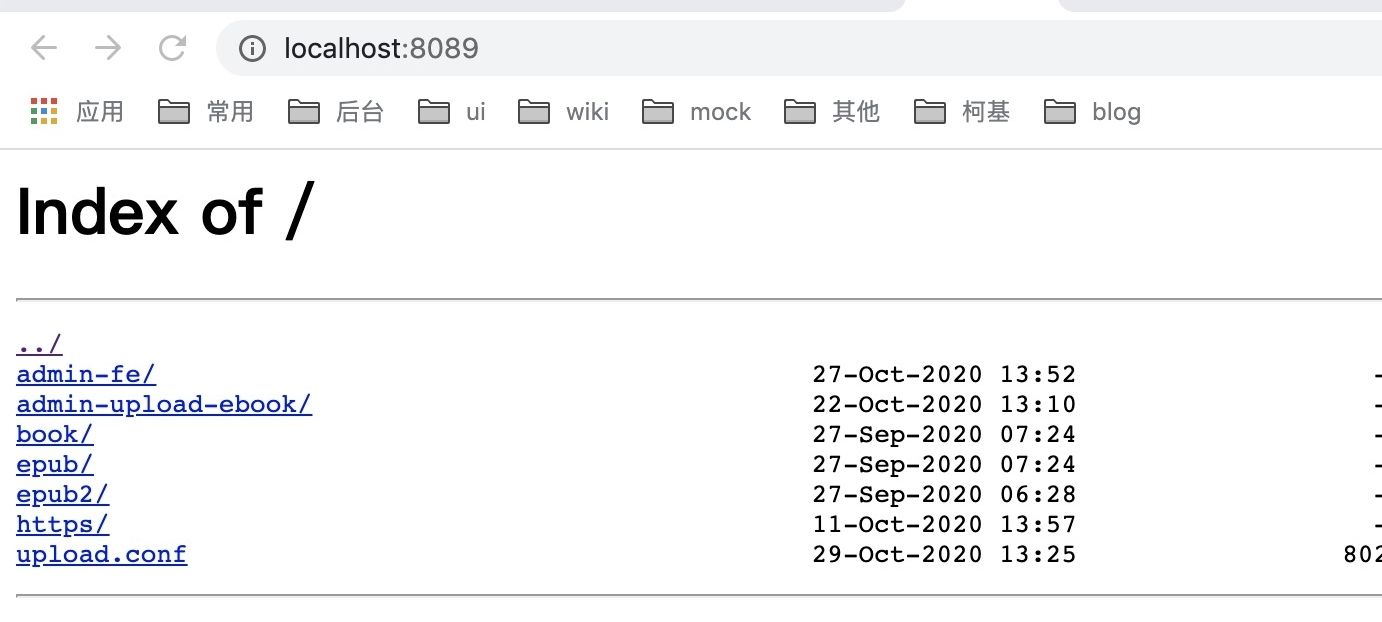
- 输入:
http://localhost:8089则能访问到我们自己配置的位于/Users/admin/upload/下的资源:
- 输入:
https://localhost也能访问我们自己配置的位于/Users/admin/upload/下的资源:
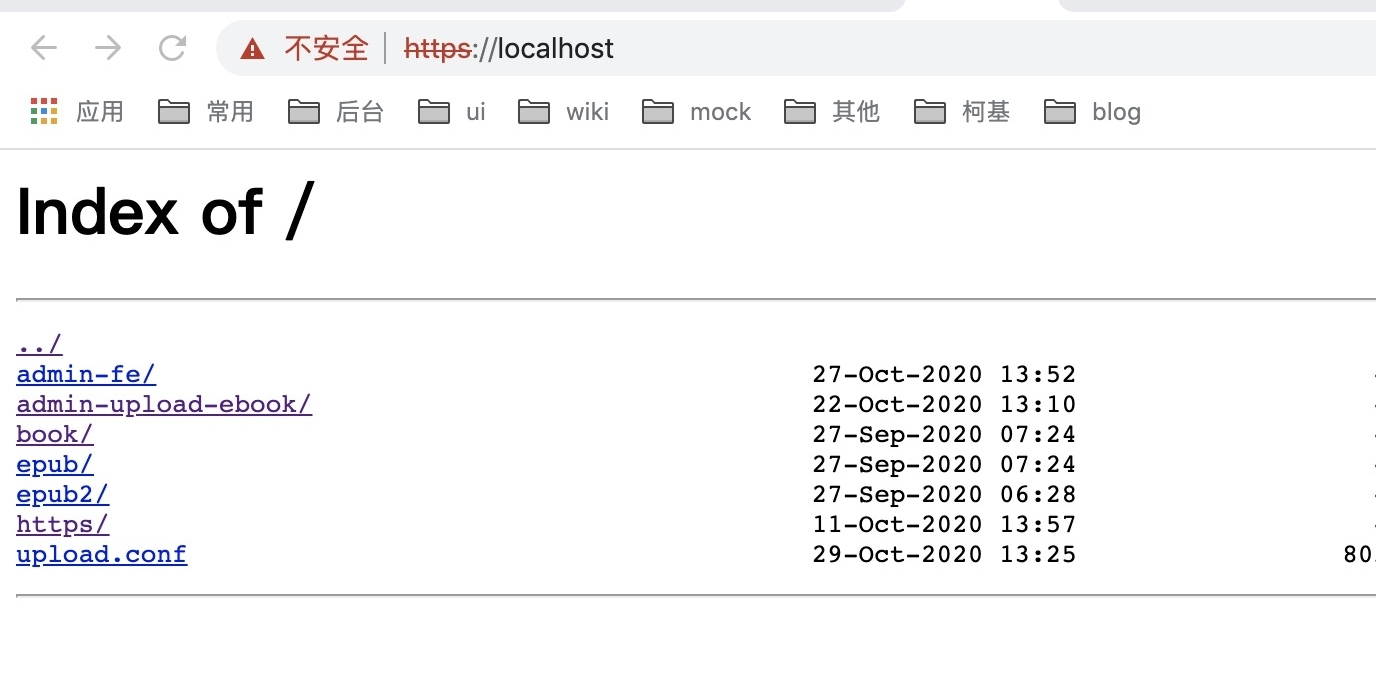
提示不安全是因为ssl证书是跟域名绑定的,这里输入的是localhost提示不安全是正常的~
- 代理域名
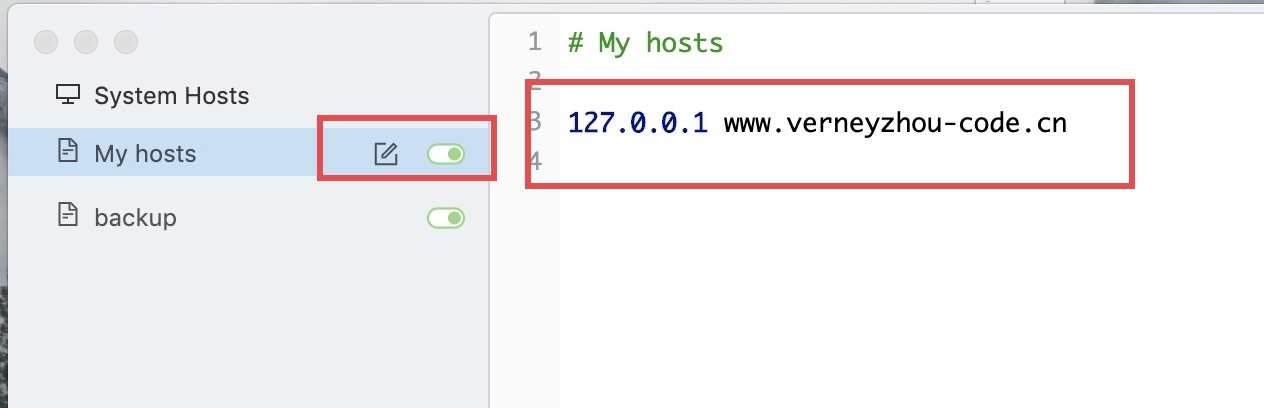
- 接下来可通过
switchHosts将 本地ip代理到配置文件中ssl证书对应的域名:
- 也可通过命令行直接修改:
vim /etc/hosts # mac根目录下etc一般保存着电脑的host配置文件
现在在浏览器输入:https://www.verneyzhou-code.cn/ 就可以访问到本地 /Users/admin/upload/ 下的资源:
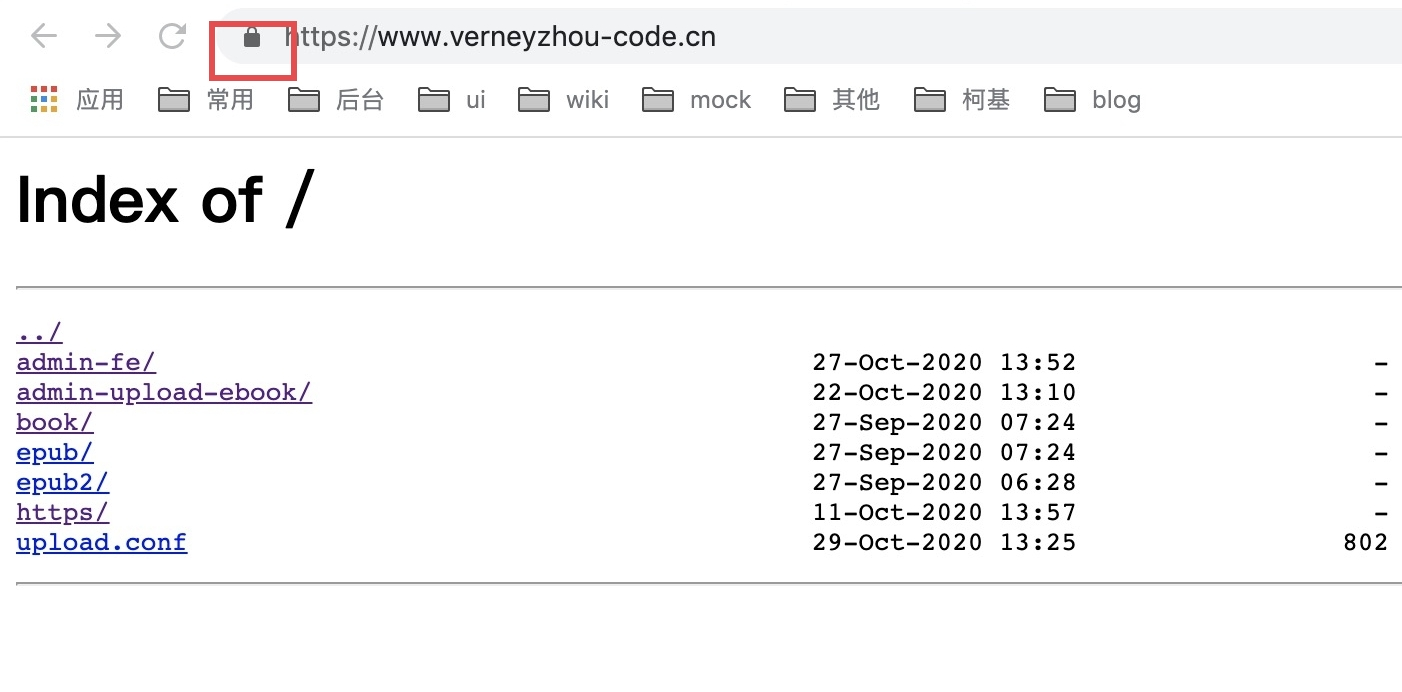
这样就不会提示不安全~
# 常见命令
sudo nginx # 启动nginx服务
ps -ef|grep nginx # 查看nginx进程
sudo nginx -s stop # 停止nginx服务
sudo nginx -s reload # 重启
sudo nginx -t # 查看是否有语法错误 / 查看nginx安装目录
which nginx # 查看nginx安装目录

:set nu  # 当vim nginx.conf 打开配置文件后可输入此命令显示行数

curl https://www.verneyzhou-code.cn:18082/user/login -X POST -d "username=sam&password=123456"  # 终端调用接口
# 常见问题
Back暂无~
上次更新: 1/28/2024, 9:19:51 PM